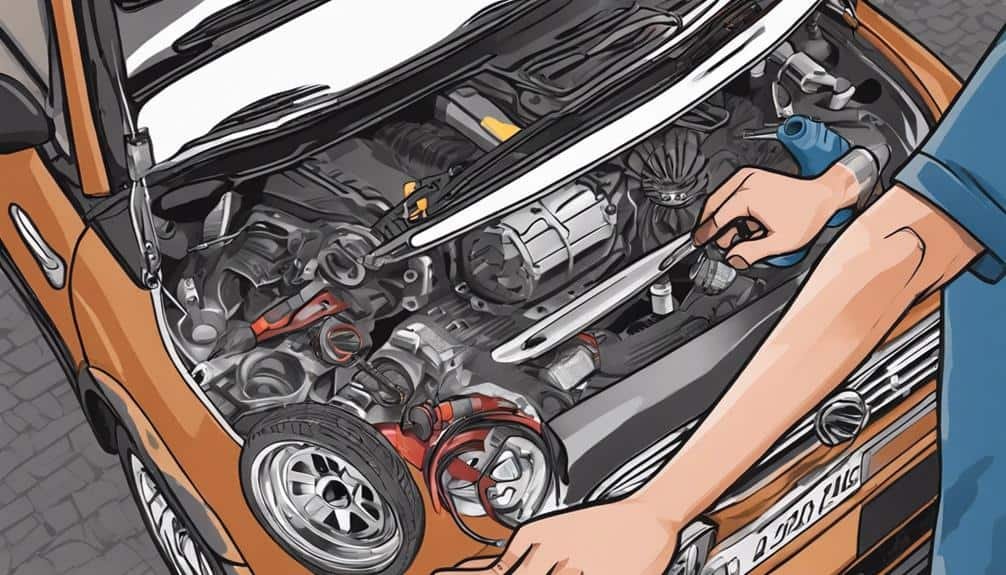
To change a clutch on a Mini Cooper, start by prepping your workspace and ensuring it's well-lit. Position your car on a level surface and use wheel chocks for safety. Always wear gloves and eye protection. Support the engine and transmission carefully to avoid damage. Disconnect the battery to prevent electrical mishaps. Next, remove the transmission assembly, including draining fluid and detaching the hydraulic connection. Install the clutch assembly with high-temperature grease and follow the correct torque sequence. Perform final checks ensuring all components are aligned and properly torqued. With these steps, you'll maintain the efficiency of your Mini Cooper's clutch, and there's more to explore to keep it in peak condition.
Preparing the Workspace
Before starting the clutch replacement on your Mini Cooper, it's important to set up your workspace by clearing any clutter and ensuring optimal lighting for best visibility. You're initiating a task that demands precision, and the final thing you need is to misplace a key component amidst a mess. Begin by positioning your Mini Cooper on a level surface. This isn't just about convenience; it's a critical safety measure. Next, place wheel chocks behind the rear wheels to prevent any movement. This step is essential to guarantee your car remains stable when you're working underneath it.
Now, gather all necessary tools and equipment. You'll need jack stands and a floor jack to lift and support your Mini Cooper, allowing you access to the transmission for the clutch replacement. A torque wrench is essential for tightening bolts to the manufacturer's specifications, ensuring everything is securely fastened. Don't forget to have a drain pan ready for any fluids that may need to be drained during the process. To keep track of small parts, consider using a magnetic tray. Lastly, prioritize your safety by wearing gloves and eye protection. Setting up your workspace meticulously lays the groundwork for a successful clutch replacement.
Engine and Transmission Support
To ensure the engine remains stable while you work on replacing the clutch in your Mini Cooper, it's important to use a brace or support system designed for this purpose. Engine and transmission support isn't just about keeping these components in place; it's about damage prevention. Without proper bracing, you risk harming essential parts of your Mini Cooper during the clutch replacement process.
Securing the engine and the transmission requires specific steps. To start with, you'll need to choose a brace that can handle the weight and complexity of a Mini Cooper's engine. This brace should ideally attach to solid points on the engine and the car's body or frame, ensuring stability throughout the operation.
For the transmission, the support strategy might differ slightly. As you won't always need to remove the transmission entirely, carefully lowering and supporting it's key. Use a transmission jack or an equivalent support system to gently lower the transmission. This controlled lowering prevents any sudden movements that could cause damage.
Component Removal Steps
Before you tackle the clutch, you'll first need to disconnect the battery to guarantee safety throughout the process.
Next, you'll remove the transmission assembly by supporting the engine, detaching all necessary connections, and carefully removing bolts and components as outlined.
Disconnect Battery First
As a crucial first step in your clutch replacement process, always disconnect the battery to safeguard against electrical mishaps. Removing the battery terminals is vital to guarantee safety and prevent accidental activation of electrical components or potential damage. This is a fundamental safety procedure before commencing any mechanical work on your Mini Cooper. Failing to disconnect the battery can lead to electrical shorts, complicating the clutch replacement.
| Action | Purpose | Outcome |
|---|---|---|
| Disconnect battery | Prevent electrical mishaps | Safe work environment |
| Remove battery terminals | Ensure safety, prevent accidental activation | Avoid electrical shorts/damage |
| Follow safety procedures | Standard practice before mechanical work | Successful clutch replacement |
| Prevent damage | Essential in component removal | Smooth process |
Adhering to these steps guarantees a safe and effective approach to changing your Mini Cooper's clutch.
Remove Transmission Assembly
After ensuring your Mini Cooper's electrical system is safely disconnected, you'll next focus on removing the transmission assembly, a vital step in accessing the clutch.
Start by using an impact gun to remove the 32mm nut securing the axle shaft. You might need a puller to press the axle shaft out of the wheel bearing.
Next, drain the transmission fluid and pry the dust seal to free the drive axles. Then, remove the bolts holding the axle carrier to the engine block.
You'll also need to disconnect the hydraulic connection and gearshift cable ends to remove the clutch slave cylinder. These steps are essential for successfully removing the transmission assembly and getting closer to the clutch.
Extract Old Clutch
To extract the old clutch from your Mini Cooper, you'll first need to use an impact gun to loosen and remove the 32mm nut securing the axle shaft. Afterward, a puller may be required to press the axle shaft out of the wheel bearing.
Next, drain the transmission fluid and carefully pry the dust seal to free the drive axles, providing clear access to the clutch components. You'll then remove the bolts that hold the axle carrier to the engine block.
Before you can remove the clutch components, disconnect the hydraulic connection and the gearshift cable ends. Finally, remove the clutch slave cylinder from the transmission.
This step-by-step process ensures you've properly prepared to remove the old clutch.
Clutch Assembly Installation
Now that you've removed the old clutch components from your Mini Cooper, it's essential to prepare the new clutch assembly for installation.
Begin by applying high-temperature grease and anti-seize to the specified areas to guarantee smooth operation and longevity of the clutch system.
Follow this with a meticulous installation process, adhering to the correct torque specifications and sequence, and conclude with thorough final assembly checks to confirm everything is seated and aligned properly.
Preparing New Clutch Assembly
Before installing the new clutch assembly in your Mini Cooper, make sure you've gathered all necessary tools and materials, including high-temperature grease and anti-seize lubricant. Apply high-temperature grease to the throw-out bearing and input shaft to guarantee proper lubrication. Use anti-seize on the pivot ball and slave cylinder to prevent binding and promote smooth operation.
Additionally, grease the contact points on the pressure plate where the throw-out bearing will make contact. The fasteners for the clutch assembly, typically T-55, may require Loctite for a secure installation. It's important to ensure proper alignment with the clutch alignment tool and adhere to torque specifications during the installation to prevent issues with clutch operation, avoiding any future complications with clutch dust or misalignment.
Installation Process Overview
With all necessary components and tools at hand, you'll start the installation of the clutch assembly by mounting the flywheel, making sure it's perfectly aligned for optimal performance. It's vital to check the front and rear main seal for any signs of wear and replace if necessary before proceeding.
Next, carefully attach the dual mass flywheel onto the input shaft, using high-temperature grease for lubrication. This step guarantees a smooth shift when engaging and disengaging the clutch.
Secure the clutch disc and pressure plate to the flywheel, following the manufacturer's torque specifications to avoid any potential issues. Apply anti-seize to the pivot ball and threads of the slave cylinder within the bell housing to prevent corrosion and ensure longevity.
This detailed approach ensures the clutch assembly operates smoothly under various driving conditions.
Final Assembly Checks
After securing the clutch disc and pressure plate, it's important to perform final assembly checks to guarantee smooth operation of the clutch assembly.
First, check for proper gaps between the clutch components. These gaps are vital for smooth engagement and disengagement, so handle the clutch assembly with care to maintain the correct air gap for best performance.
Clean all bolts before installation to avoid any issues with securing the clutch components. Follow a specific installation sequence to make sure everything is put together correctly.
Lastly, torque all fasteners to the manufacturer's specifications. This step is essential for ensuring the durability and functionality of the clutch system.
Performing these final assembly checks ensures your Mini Cooper's clutch operates at peak efficiency.
Final Assembly and Checks
Make sure you properly align and orient the clutch components during the final assembly to avoid any future complications. This critical step guarantees that the clutch engages smoothly and operates efficiently. First, clean and inspect all bolts to make sure they're free from debris and damage. Any overlooked flaw can lead to issues down the line, so it's essential to start with components in top condition.
Next, follow the specific installation sequence recommended for your Mini Cooper's clutch assembly. This sequence is designed to make certain each part is installed in the correct order, minimizing the risk of misalignment or improper fitting. As you work, torque all fasteners to the manufacturer's specifications. Using a torque wrench, apply the precise amount of force to each bolt. This step is crucial for securing the clutch components firmly in place, preventing them from becoming loose over time due to vibrations or stress.
Maintenance Tips
Regularly checking and replacing the rear main seal is crucial to avoid oil leaks and guarantee your clutch maintains peak performance. During clutch maintenance, it's vital to clean and lubricate key components such as the input shaft and throwout bearing. This ensures smooth operation and extends the lifespan of your clutch system.
For lubrication, apply high-temperature grease to the input shaft sparingly. This type of grease is designed to withstand the extreme conditions within the clutch assembly without breaking down. Additionally, use anti-seize on the threads of the input shaft to prevent corrosion and ensure easy disassembly in the future. These products not only reduce noise but also protect against wear and tear.
Always replace the throwout bearing with every clutch replacement. This component is central to the clutch's functionality, and a new throwout bearing helps to maintain peak performance and reliability. When reinstalling the clutch, make sure to properly torque the clutch fasteners, typically with a T-55, and consider applying Loctite for a more secure installation. This extra step prevents fasteners from loosening over time, safeguarding against potential clutch failure.
Frequently Asked Questions
How Long Does It Take to Change a Clutch on a Mini Cooper?
You'll typically spend 4 to 6 hours changing a Mini Cooper's clutch if you're skilled. DIYers might need a full day, while professionals are quicker. Having the right tools and parts ready streamlines the process.
How Much Does It Cost to Replace a Clutch in a Mini Cooper?
Replacing your Mini Cooper's clutch costs between $800 to $1,500. This includes $300 to $600 for OEM parts and $500 to $900 for labor. Prices vary by model, location, and transmission type. Always compare quotes.
Can I Replace a Clutch Myself?
Absolutely, you can replace a clutch yourself if you have the proper tools, patience, and a detailed guide. Make sure you grasp the disassembly, clutch installation, and torque specs to prevent any mishaps.
How Do You Know if Your Clutch Is Bad on a Mini Cooper?
You'll know your Mini's clutch is kaput if shifting gears becomes tough, you hear grinding, spot clutch dust, feel pedal vibrations, or smell burning. These signs scream "clutch failure" and demand attention.
Conclusion
In wrapping up, you've meticulously prepared your workspace, bolstered the engine and transmission, and navigated through the removal steps with precision.
You've skillfully installed the new clutch assembly, pieced everything back together, and conducted thorough checks to confirm everything's in excellent condition.
Remember, maintaining your Mini Cooper's clutch involves regular inspections and adjustments. By adhering to these steps and tips, you'll prolong the life of your clutch, ensuring smoother rides and peak performance.
Stay vigilant, keep learning, and drive safely.
