-
Table of Contents
- Introduction
- Step-by-Step Guide to Changing a Headlight on a 2013 Mini Cooper
- What Tools Do You Need to Change a Headlight on a 2013 Mini Cooper?
- Common Problems When Changing a Headlight on a 2013 Mini Cooper
- Tips for Making the Headlight Change Process Easier on a 2013 Mini Cooper
- How to Troubleshoot a Headlight Change on a 2013 Mini Cooper
- Q&A
- Conclusion
Introduction
Changing a headlight on a 2013 Mini Cooper is a relatively simple task that can be completed in a few steps. This guide will provide you with the necessary information to replace the headlight on your Mini Cooper. It will cover the tools and materials needed, the steps to take, and any safety precautions to keep in mind. With the right tools and a bit of patience, you can easily replace the headlight on your 2013 Mini Cooper.
Step-by-Step Guide to Changing a Headlight on a 2013 Mini Cooper
Changing a headlight on a 2013 Mini Cooper is a relatively simple process that can be completed in a few steps.
Step 1: Park the car in a safe, well-lit area and turn off the engine.
Step 2: Open the hood of the car and locate the headlight assembly.
Step 3: Unscrew the retaining screws that hold the headlight assembly in place.
Step 4: Carefully remove the headlight assembly from the car.
Step 5: Disconnect the wiring harness from the back of the headlight assembly.
Step 6: Remove the old headlight bulb from the headlight assembly.
Step 7: Install the new headlight bulb into the headlight assembly.
Step 8: Reconnect the wiring harness to the back of the headlight assembly.
Step 9: Carefully place the headlight assembly back into the car.
Step 10: Secure the headlight assembly in place with the retaining screws.
Step 11: Close the hood of the car and turn on the engine to test the new headlight.
By following these steps, you can easily change the headlight on your 2013 Mini Cooper.
What Tools Do You Need to Change a Headlight on a 2013 Mini Cooper?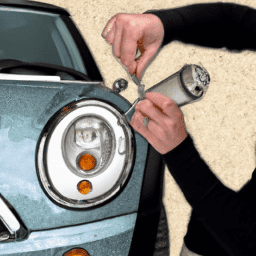
Changing a headlight on a 2013 Mini Cooper requires a few basic tools. These include a flathead screwdriver, a Phillips head screwdriver, a 10mm socket wrench, and a replacement headlight bulb.
First, open the hood of the car and locate the headlight assembly. This is located on the front of the car, near the bumper. Using the flathead screwdriver, remove the two screws that hold the headlight assembly in place.
Next, use the 10mm socket wrench to remove the three bolts that secure the headlight assembly to the car. Carefully remove the headlight assembly from the car.
Once the headlight assembly is removed, use the Phillips head screwdriver to remove the two screws that hold the headlight bulb in place. Carefully remove the headlight bulb from the assembly.
Finally, insert the new headlight bulb into the assembly and secure it with the two screws. Reattach the headlight assembly to the car using the three bolts and the 10mm socket wrench. Replace the two screws that hold the headlight assembly in place and close the hood.
Common Problems When Changing a Headlight on a 2013 Mini Cooper
When changing a headlight on a 2013 Mini Cooper, there are a few common problems that may arise.
First, the headlight may be difficult to access. The headlight is located in the front bumper of the car, and accessing it can be a challenge. It is important to use caution when attempting to access the headlight, as the bumper may be fragile and easily damaged.
Second, the headlight may be difficult to remove. The headlight is held in place by a series of screws and clips, and these can be difficult to access and remove. It is important to use the correct tools when attempting to remove the headlight, as using the wrong tools may damage the headlight or the surrounding area.
Third, the headlight may be difficult to install. Installing the new headlight requires lining up the screws and clips correctly, and this can be a challenge. It is important to take your time when installing the new headlight, as rushing may result in an improper installation.
Finally, the headlight may not work properly. This is usually due to an improper installation, and it is important to double-check the installation before driving the car. If the headlight does not work properly, it is important to have it checked by a professional.
Tips for Making the Headlight Change Process Easier on a 2013 Mini Cooper
1. Park the car in a safe, well-lit area and make sure the engine is off.
2. Open the hood and locate the headlight assembly.
3. Disconnect the negative battery cable to prevent any electrical shocks.
4. Unscrew the retaining screws that hold the headlight assembly in place.
5. Carefully remove the headlight assembly and disconnect the wiring harness.
6. Install the new headlight assembly and reconnect the wiring harness.
7. Secure the headlight assembly with the retaining screws.
8. Reconnect the negative battery cable.
9. Test the new headlight to make sure it is working properly.
10. Close the hood and enjoy your new headlight.
How to Troubleshoot a Headlight Change on a 2013 Mini Cooper
If you are having difficulty changing the headlight on your 2013 Mini Cooper, there are a few steps you can take to troubleshoot the issue.
First, check the headlight bulb to make sure it is the correct type for your vehicle. The 2013 Mini Cooper requires a H7 bulb. If the bulb is not the correct type, replace it with the correct one.
Next, check the headlight housing to make sure it is securely attached to the vehicle. If the housing is loose, tighten the screws or bolts that hold it in place.
If the headlight housing is secure, check the wiring harness to make sure it is properly connected. If the wiring harness is not connected, reconnect it.
Finally, check the fuse box to make sure the fuse for the headlight is not blown. If the fuse is blown, replace it with a new one.
If you have followed these steps and the headlight still does not work, it may be necessary to take your vehicle to a qualified mechanic for further diagnosis.
Q&A
1. What tools do I need to change a headlight on a 2013 Mini Cooper?
A: You will need a flathead screwdriver, a Phillips head screwdriver, and a 10mm socket wrench.
2. How do I access the headlight assembly?
A: To access the headlight assembly, you will need to remove the front bumper cover. This can be done by removing the screws and clips that hold the cover in place.
3. How do I remove the headlight assembly?
A: To remove the headlight assembly, you will need to remove the screws and clips that hold it in place. Once these are removed, you can carefully pull the assembly out of the vehicle.
4. How do I install the new headlight assembly?
A: To install the new headlight assembly, you will need to reverse the steps you took to remove the old one. Make sure to secure the screws and clips tightly to ensure a secure fit.
5. What should I do if the new headlight does not fit properly?
A: If the new headlight does not fit properly, you may need to adjust the mounting brackets or adjust the alignment of the headlight. If this does not work, you may need to purchase a new headlight assembly that is designed for your specific vehicle.
Conclusion
Changing a headlight on a 2013 Mini Cooper is a relatively simple process that can be completed in a few steps. With the right tools and a bit of patience, you can easily replace the headlight and get back on the road in no time. It is important to remember to always wear safety glasses and gloves when working on your car, and to always follow the manufacturer’s instructions for any repairs.
