-
Table of Contents
- Introduction
- Step-by-Step Guide to Replacing the Side Lights on a Mini Cooper
- How to Choose the Right Side Lights for Your Mini Cooper
- Common Problems with Mini Cooper Side Lights and How to Fix Them
- Tips for Maintaining Your Mini Cooper Side Lights
- The Benefits of Upgrading Your Mini Cooper Side Lights
- Q&A
- Conclusion
Introduction
Changing the side lights on a Mini Cooper is a relatively simple process that can be done in a few steps. Whether you are replacing a burnt out bulb or upgrading to a brighter LED light, this guide will walk you through the process of changing the side lights on your Mini Cooper. With the right tools and a bit of patience, you can have your Mini Cooper looking its best in no time.
Step-by-Step Guide to Replacing the Side Lights on a Mini Cooper
Replacing the side lights on a Mini Cooper is a relatively simple task that can be completed in a few steps. This guide will provide step-by-step instructions on how to replace the side lights on a Mini Cooper.
Step 1: Gather the necessary tools and materials. You will need a flathead screwdriver, a Phillips head screwdriver, and a new set of side lights for your Mini Cooper.
Step 2: Open the hood of your Mini Cooper and locate the side lights. The side lights are located on either side of the front of the car, near the headlights.
Step 3: Using the flathead screwdriver, remove the screws that hold the side lights in place.
Step 4: Carefully remove the side lights from the car.
Step 5: Insert the new side lights into the car and secure them with the screws.
Step 6: Close the hood of the car and test the new side lights to make sure they are working properly.
By following these steps, you should be able to easily replace the side lights on your Mini Cooper. If you have any questions or need additional help, please consult your local Mini Cooper dealer.
How to Choose the Right Side Lights for Your Mini Cooper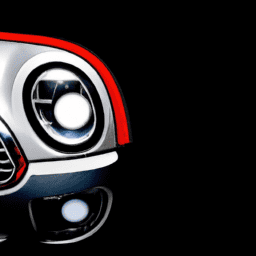
When it comes to choosing the right side lights for your Mini Cooper, there are a few important factors to consider. First, you should make sure that the side lights you choose are compatible with your Mini Cooper model. Different models may require different types of side lights, so it is important to check the specifications of your car before making a purchase.
Second, you should consider the type of side lights you want. There are a variety of options available, including LED, halogen, and xenon lights. Each type of light has its own advantages and disadvantages, so it is important to research the different types and decide which one is best for your needs.
Third, you should consider the brightness of the side lights. The brighter the light, the more visible your car will be on the road. However, it is important to make sure that the brightness is not too bright, as this can be distracting to other drivers.
Finally, you should consider the cost of the side lights. Different types of lights can vary in price, so it is important to compare prices before making a purchase.
By taking the time to consider these factors, you can ensure that you choose the right side lights for your Mini Cooper. With the right lights, you can ensure that your car is visible and safe on the road.
Common Problems with Mini Cooper Side Lights and How to Fix Them
Mini Cooper side lights are an important part of the vehicle’s lighting system, providing additional visibility and safety for drivers. Unfortunately, these lights can sometimes malfunction, leading to a variety of issues. Here are some of the most common problems with Mini Cooper side lights and how to fix them.
One of the most common problems with Mini Cooper side lights is a blown fuse. If the side lights are not working, the first thing to check is the fuse box. If the fuse is blown, it will need to be replaced. To do this, locate the fuse box, remove the old fuse, and replace it with a new one of the same amperage.
Another common issue is a faulty bulb. If the side lights are not working, check the bulbs to make sure they are properly connected and in good condition. If the bulbs are damaged or not properly connected, they will need to be replaced.
Finally, a faulty wiring harness can also cause problems with Mini Cooper side lights. If the wiring harness is damaged or corroded, it will need to be replaced. To do this, locate the wiring harness, disconnect it, and replace it with a new one.
By following these steps, you can easily diagnose and fix any problems with Mini Cooper side lights. If the issue persists, it is best to take the vehicle to a qualified mechanic for further inspection.
Tips for Maintaining Your Mini Cooper Side Lights
1. Check the lights regularly: Make sure to check the lights on your Mini Cooper regularly to ensure they are working properly. This includes the side lights, as well as the headlights and taillights.
2. Clean the lenses: Dirt and debris can accumulate on the lenses of your side lights, reducing their effectiveness. Clean the lenses with a soft cloth and a mild detergent to keep them clear.
3. Replace bulbs as needed: If your side lights are not working properly, it may be due to a burned-out bulb. Replace the bulbs as needed to ensure your lights are working properly.
4. Check the wiring: If your side lights are not working, it may be due to a wiring issue. Check the wiring to make sure it is connected properly and that there are no loose connections.
5. Protect the lights: To keep your side lights in good condition, make sure to protect them from the elements. This includes keeping them covered when not in use and avoiding contact with water or other liquids.
6. Have them serviced: If you notice any issues with your side lights, have them serviced by a professional. This will ensure that any problems are addressed quickly and correctly.
The Benefits of Upgrading Your Mini Cooper Side Lights
Upgrading your Mini Cooper side lights is a great way to improve the look and safety of your vehicle. Side lights are an important part of a vehicle’s lighting system, providing visibility and safety for drivers and pedestrians alike. Upgrading your Mini Cooper side lights can provide a number of benefits, including improved visibility, increased safety, and a more stylish look.
Improved Visibility: Upgrading your Mini Cooper side lights can provide improved visibility in low-light conditions. Many aftermarket side lights are brighter and more powerful than the stock lights, allowing you to see more clearly in the dark. This can be especially beneficial when driving in areas with limited street lighting or in areas with poor visibility due to fog or rain.
Increased Safety: Upgrading your Mini Cooper side lights can also increase safety. Many aftermarket side lights are designed to be more visible to other drivers, helping to reduce the risk of accidents. Additionally, brighter side lights can help you to spot potential hazards in the road ahead, such as potholes or debris.
Stylish Look: Upgrading your Mini Cooper side lights can also give your vehicle a more stylish look. Aftermarket side lights are available in a variety of colors and styles, allowing you to customize the look of your vehicle. This can be a great way to make your Mini Cooper stand out from the crowd.
Upgrading your Mini Cooper side lights is a great way to improve the look and safety of your vehicle. Improved visibility, increased safety, and a more stylish look are just a few of the benefits that can be gained from upgrading your side lights. If you’re looking to upgrade your Mini Cooper side lights, be sure to do your research and find a quality product that meets your needs.
Q&A
1. How do I access the side lights on a Mini Cooper?
To access the side lights on a Mini Cooper, you will need to open the hood and locate the headlight assembly. The side lights are located on the sides of the headlight assembly.
2. What tools do I need to change the side lights on a Mini Cooper?
To change the side lights on a Mini Cooper, you will need a flathead screwdriver, a Phillips head screwdriver, and a replacement side light bulb.
3. How do I remove the old side light bulb?
To remove the old side light bulb, use a flathead screwdriver to carefully pry off the plastic cover from the headlight assembly. Then, use a Phillips head screwdriver to unscrew the bulb from the headlight assembly.
4. How do I install the new side light bulb?
To install the new side light bulb, first make sure that the bulb is the correct size and type for your Mini Cooper. Then, insert the new bulb into the headlight assembly and use a Phillips head screwdriver to secure it in place. Finally, replace the plastic cover.
5. What should I do if the new side light bulb does not work?
If the new side light bulb does not work, you may need to check the wiring and connections to make sure that everything is properly connected. If the wiring and connections are all in order, then you may need to replace the bulb with a new one.
Conclusion
Changing the side lights on a Mini Cooper is a relatively simple process that can be done in a few steps. With the right tools and a bit of patience, you can easily replace the side lights on your Mini Cooper and have it looking like new in no time.
