-
Table of Contents
- Introduction
- Step-by-Step Guide to Removing the Radio from a 2012 Mini Cooper
- What Tools Are Needed to Remove the Radio from a 2012 Mini Cooper?
- How to Disconnect the Wiring Harness from the Radio in a 2012 Mini Cooper
- Troubleshooting Common Issues When Removing the Radio from a 2012 Mini Cooper
- Tips and Tricks for Easily Removing the Radio from a 2012 Mini Cooper
- Q&A
- Conclusion
Introduction
If you own a 2012 Mini Cooper and want to take out the radio, you may be wondering how to do it. Taking out the radio from a 2012 Mini Cooper is a relatively simple process that can be done in a few steps. In this guide, we will provide you with the necessary steps and tools to remove the radio from your 2012 Mini Cooper. With the right tools and a bit of patience, you can easily take out the radio from your 2012 Mini Cooper.
Step-by-Step Guide to Removing the Radio from a 2012 Mini Cooper
Removing the radio from a 2012 Mini Cooper is a relatively straightforward process. This guide will provide step-by-step instructions on how to do so.
1. Begin by disconnecting the negative battery cable. This will prevent any electrical shock or damage to the vehicle.
2. Remove the trim panel surrounding the radio. This can be done by using a flathead screwdriver to gently pry the panel away from the dashboard.
3. Unscrew the four screws that hold the radio in place. These screws are located on the sides and bottom of the radio.
4. Disconnect the wiring harness from the back of the radio. This can be done by gently pulling the wiring harness away from the radio.
5. Carefully pull the radio out of the dashboard.
6. Replace the radio with a new one, if desired.
7. Reconnect the wiring harness to the new radio.
8. Reinstall the four screws that hold the radio in place.
9. Reattach the trim panel to the dashboard.
10. Reconnect the negative battery cable.
By following these steps, you should be able to successfully remove the radio from a 2012 Mini Cooper.
What Tools Are Needed to Remove the Radio from a 2012 Mini Cooper?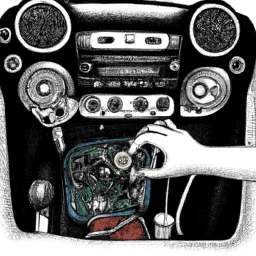
In order to remove the radio from a 2012 Mini Cooper, the following tools are necessary:
1. A Phillips head screwdriver
2. A flathead screwdriver
3. A trim removal tool
4. A 10mm socket wrench
5. A pair of needle nose pliers
Begin by using the Phillips head screwdriver to remove the four screws located around the radio. Next, use the flathead screwdriver to pry the radio out of the dashboard. Once the radio is loose, use the trim removal tool to disconnect the wiring harness. Then, use the 10mm socket wrench to remove the four bolts that secure the radio to the mounting bracket. Finally, use the needle nose pliers to disconnect the antenna cable from the back of the radio.
How to Disconnect the Wiring Harness from the Radio in a 2012 Mini Cooper
Disconnecting the wiring harness from the radio in a 2012 Mini Cooper is a relatively simple process. To begin, you will need to locate the wiring harness. This is typically located in the back of the radio. Once you have located the wiring harness, you will need to disconnect it. To do this, you will need to press down on the tab located on the side of the wiring harness. This will release the wiring harness from the radio. Once the wiring harness is disconnected, you can remove the radio from the vehicle.
Troubleshooting Common Issues When Removing the Radio from a 2012 Mini Cooper
If you are attempting to remove the radio from a 2012 Mini Cooper, there are a few common issues that you may encounter. It is important to be aware of these issues and how to troubleshoot them in order to ensure a successful removal.
The first issue you may encounter is that the radio may be stuck in the dashboard. This is due to the fact that the radio is held in place by four screws. To remove the radio, you will need to unscrew the four screws and then gently pull the radio out of the dashboard.
The second issue you may encounter is that the wiring harness may be stuck in the dashboard. This is due to the fact that the wiring harness is connected to the radio and is held in place by two screws. To remove the wiring harness, you will need to unscrew the two screws and then gently pull the wiring harness out of the dashboard.
The third issue you may encounter is that the antenna cable may be stuck in the dashboard. This is due to the fact that the antenna cable is connected to the radio and is held in place by one screw. To remove the antenna cable, you will need to unscrew the one screw and then gently pull the antenna cable out of the dashboard.
Finally, the fourth issue you may encounter is that the radio may be difficult to remove from the dashboard. This is due to the fact that the radio is held in place by four screws and is connected to the wiring harness and antenna cable. To remove the radio, you will need to unscrew the four screws, disconnect the wiring harness and antenna cable, and then gently pull the radio out of the dashboard.
By being aware of these common issues and how to troubleshoot them, you can ensure a successful removal of the radio from a 2012 Mini Cooper.
Tips and Tricks for Easily Removing the Radio from a 2012 Mini Cooper
Removing the radio from a 2012 Mini Cooper is a relatively straightforward process. However, it is important to take the necessary precautions to ensure that the job is done safely and correctly. Here are some tips and tricks to help you easily remove the radio from your 2012 Mini Cooper:
1. Disconnect the negative battery cable. This is an important safety precaution to ensure that no electrical current is running through the car while you are working on it.
2. Remove the trim panel. This is the plastic panel that surrounds the radio. It is held in place by several screws, which can be removed with a Phillips head screwdriver.
3. Unplug the wiring harness. This is the connection between the radio and the car’s electrical system. Carefully unplug the wiring harness from the back of the radio.
4. Remove the mounting screws. There are four screws that hold the radio in place. Use a Phillips head screwdriver to remove these screws.
5. Pull the radio out. Once the screws have been removed, you can carefully pull the radio out of the dashboard.
By following these steps, you can easily remove the radio from your 2012 Mini Cooper. Be sure to take all necessary safety precautions and use the correct tools to ensure that the job is done correctly.
Q&A
1. What tools do I need to remove the radio from a 2012 Mini Cooper?
A: You will need a flathead screwdriver, a Phillips head screwdriver, and a panel removal tool.
2. How do I access the radio in a 2012 Mini Cooper?
A: To access the radio in a 2012 Mini Cooper, you will need to remove the center console trim panel.
3. How do I remove the center console trim panel in a 2012 Mini Cooper?
A: To remove the center console trim panel in a 2012 Mini Cooper, you will need to use a panel removal tool to carefully pry the panel away from the dashboard.
4. How do I disconnect the radio from the wiring harness in a 2012 Mini Cooper?
A: To disconnect the radio from the wiring harness in a 2012 Mini Cooper, you will need to locate the wiring harness connector and then press the release tab to disconnect it.
5. How do I remove the radio from the dashboard in a 2012 Mini Cooper?
A: To remove the radio from the dashboard in a 2012 Mini Cooper, you will need to unscrew the mounting screws with a Phillips head screwdriver and then carefully pull the radio out of the dashboard.
Conclusion
Removing the radio from a 2012 Mini Cooper is a relatively simple process that can be completed in a few steps. With the right tools and a bit of patience, you can easily remove the radio from your Mini Cooper and replace it with a new one. It is important to remember to disconnect the battery before beginning the process to avoid any potential damage to the car’s electrical system.
