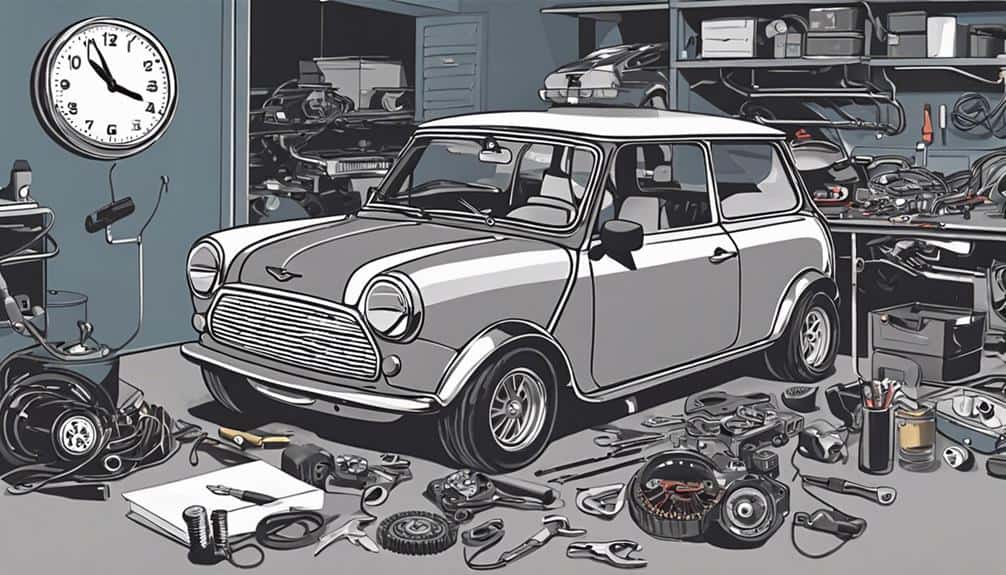
Replacing the alternator on a Mini Cooper typically takes about 2.3 hours. First, you'll need to disconnect the battery, which guarantees your safety throughout the process. Different Mini Cooper models, like the R50 or supercharged versions, have specific steps, especially regarding access to the alternator. You'll remove the front bumper cover and possibly extend the radiator support for better access. After releasing the tensioner, you'll remove the alternator belt, unscrew the alternator bolts, and disconnect the electrical connectors. Having the right tools, such as socket wrenches and a belt tensioner tool, is essential. With detailed steps followed, you'll be set for a smooth installation. Dive deeper to make sure no step is overlooked.
Understanding Alternator Function
While the engine hums to life, the alternator in your Mini Cooper kicks into gear, supplying a steady stream of electricity essential for keeping everything running smoothly. This component is the heart of your vehicle's electrical system, converting mechanical energy into electrical energy to power your lights, radio, and other systems, and importantly, to charge your battery. Over time, an alternator's efficiency can diminish due to wear and tear, leading to a range of electrical issues.
To guarantee your alternator functions correctly, it's crucial to regularly check the belt tension and the voltage at the battery terminals with the engine running. An incorrect belt tension can cause the alternator to work inefficiently, either by overworking or underworking, which in turn affects its lifespan and your Mini Cooper's electrical system's reliability. Similarly, the engine ground strap, an often overlooked component, is critical for maintaining a complete circuit. A faulty ground strap can lead to erratic electrical behavior or complete system failure. Additionally, an overcharging alternator might push too much voltage into the system, risking battery leakage and consequent electrical complications. Being proactive about these checks can save you time and prevent potential electrical failures.
Necessary Tools and Materials
Before you start replacing the alternator on your Mini Cooper, it's important to gather all the necessary tools and materials.
You'll need a complete set of socket wrenches, screwdrivers, pliers, and a belt tensioner tool, along with a new alternator and possibly a serpentine belt.
Don't forget safety gear like gloves and a container for coolant spillage to guarantee a smooth and safe repair process.
Required Tools List
To successfully replace the alternator on a Mini Cooper, you'll need a complete set of tools including a ratchet set, torque wrench, and socket set, alongside a specialized belt tensioner tool. This task isn't just about removing and replacing; it's about precision and making sure the serpentine belt is correctly aligned and tensioned. Here's a concise list to focus on:
- Belt Tensioner Tool: Essential for adjusting the tension on the serpentine belt.
- Ratchet and Socket Set: For unfastening and securing the alternator's mounting bolts.
- Torque Wrench: To make certain all bolts are tightened to the manufacturer's specified torque.
- Battery Terminal Wrench: Crucial for disconnecting the battery to avoid electrical shorts.
Equipping yourself with these tools ensures a smoother alternator replacement process.
Essential Materials Overview
Having outlined the necessary tools for a Mini Cooper's alternator replacement, let's now focus on the specific materials and safety gear you'll need to complete the job effectively.
To begin with, acquiring a new alternator specifically designed for your MINI Cooper is crucial. If your vehicle's alternator has failed, it's likely time to also consider replacing the belt. As such, having a replacement belt on hand is wise, especially if the existing one shows signs of wear or damage.
Additionally, since the alternator replacement process may involve removing the radiator, you'll need coolant to bleed the system afterwards. This ensures your engine maintains ideal temperature regulation.
Safety Equipment Guide
Ensuring your safety is vital when replacing an alternator on your Mini Cooper. It's essential to gear up with safety goggles, gloves, and a fire extinguisher before you begin.
Here's a focused list of the necessary safety equipment and precautions:
- Safety Goggles and Gloves: Protect your eyes from sparks or debris and your hands from sharp edges around the electrical system and front bumper.
- Fire Extinguisher: Keep it nearby in case of any electrical fires.
- Jack and Jack Stands: Essential for lifting and securing your vehicle safely while you work.
- Battery Disconnection: Always disconnect the battery before starting to prevent any electrical accidents.
Mini Cooper Model Variations
When dealing with a Mini Cooper, it's important to recognize the model variations, as the R50's alternator mounting differs greatly from that of supercharged versions. Specifically, the R50 models, which aren't supercharged, require you to approach the alternator replacement with different steps, particularly around the Cooper's front. Initially, you might find it beneficial to remove the radiator to gain better access to the alternator. This isn't a straightforward process, but it certainly makes the replacement work more manageable.
Additionally, for R50 models, you'll need to tackle the front splash shield and wheel housing liner. Removing these components provides the necessary room to maneuver and effectively reach the alternator. It's not just about pulling things apart; you're aiming to create an ideal workspace.
Step-by-Step Replacement Guide
Begin by disconnecting the battery to guarantee safety before proceeding to remove the front bumper cover for access to the alternator. This step is important as it prevents any electrical shorts or damages during the replacement process.
The process of replacing an alternator on a Mini Cooper can be intricate, requiring attention to detail. Here's a concise, step-by-step guide designed to assist you through the procedure:
- Remove the Front Bumper Cover and Reinforcement: This provides clear access to the radiator core support, allowing you to reach the alternator comfortably. Depending on your Mini Cooper model, such as the R50, R55, R56, or R57, the disassembly may vary slightly.
- Extend Radiator Support (for specific models): For models such as R55/R56/R57, extending the radiator support into the service position is necessary. This step ensures there's enough space to maneuver the alternator out and the new one in.
- Release the Belt Tensioner: Loosen the belt tensioner to remove the alternator belt. This is an important step as it frees the alternator, allowing for its removal.
- Unscrew Alternator Bolts and Disconnect Connector: Finally, remove the alternator bolts and disconnect the electrical connector. Take note of the torque specifications for reinstallation, especially for specific models like the R50 Cooper, to make sure everything is reassembled correctly.
Troubleshooting Common Issues
Before you tackle replacing the alternator on your Mini Cooper, it's essential to confirm that it's indeed the source of your charging issues. Start by checking the belt tensioner and measuring the voltage at the battery to rule out other culprits.
If you notice high voltage readings or poor engine ground connections, these could be signs of alternator failure or related electrical problems needing immediate attention.
Identifying Alternator Failures
To effectively troubleshoot common issues with alternator failures, start by checking the belt tensioner and battery voltage to pinpoint potential problems. Your Mini Cooper's electrical health hinges on a functioning alternator. Here's a quick guide:
- Inspect the Drive Belt: A loose or worn drive belt can lead to insufficient alternator output. Make sure it's tight and in good condition.
- Check the Voltage Regulator: High voltage readings often point to a failing voltage regulator, a component important for charging efficiency.
- Clean Battery Connections: Use a water and baking soda solution to clean any spilled battery acid. This prevents corrosion and ensures good electrical flow.
- Examine the Engine Ground Strap: A secure and corrosion-free connection is essential for your Mini Cooper's electrical system to function properly.
Signs & Symptoms
When your Mini Cooper starts showing signs like dimming headlights or unexpected dashboard warnings, it's often a clear indicator that the alternator might be failing. Difficulty starting the car, a dead battery, strange noises, and electrical failures are all symptoms pointing towards a problematic alternator.
To diagnose these issues accurately, use a multimeter to test the alternator and charging system. If you find the alternator is indeed failing, immediate replacement is vital to prevent further damage to your Mini Cooper's electrical harness and guarantee reliable operation.
Ignoring these signs can lead to engine stalling, loss of power steering, or the battery light illuminating, indicating urgent attention is needed to replace the faulty alternator and inspect the electrical harness for any associated damages.
Estimated Labor Hours
Considering the complexity of the task, you should expect the labor for replacing an alternator on a 2003 Mini Cooper to take approximately 2.3 hours. This estimate is based on a professional mechanic's experience with the specific challenges and steps involved in the process.
Here's a breakdown of the key phases you'll encounter:
- Preparation and Access: Initially, the time to replace starts with preparing the vehicle. This includes safely lifting the car and removing any components that obstruct access to the alternator.
- Disconnecting the Battery: To guarantee safety, the battery must be disconnected before proceeding with the removal of the alternator. This step is essential to prevent any electrical accidents.
- Removing the Alternator: The bulk of the time is spent on loosening and removing the bolts securing the alternator to the engine. The placement of these bolts and the space constraints can add to the complexity of the task.
- Installation of the New Alternator: Finally, installing the new alternator involves reversing the removal process. Carefully aligning the new alternator and securing it with the bolts, followed by reassembling any components that were removed.
This detailed, step-by-step approach underlines the estimated 2.3 hours of labor required for a proficient mechanic to replace an alternator on a 2003 Mini Cooper efficiently.
Alternator Replacement Costs
How much should you expect to pay for replacing the alternator in your Mini Cooper? For a Cooper S, securing a new alternator is an essential step in ensuring your vehicle's electrical systems operate seamlessly. The overall cost for an alternator replacement typically ranges between $860 to $1,277. This cost encompasses both parts and labor, with labor costs usually falling between $305 and $384, and the parts — specifically the new alternator — varying from $555 to $893. These estimates don't include taxes, fees, or the impact of your specific location, which could affect the final price.
| Cost Component | Range |
|---|---|
| Total Cost | $860 – $1,277 |
| Labor | $305 – $384 |
| Parts | $555 – $893 |
| Taxes & Fees | Excluded |
| Location Impact | Variable |
Bear in mind, the condition of your Mini Cooper could necessitate additional repairs, influencing the overall expense. When opting for a new alternator for your Cooper S, it's critical to account for these potential variances. The precision in the choice of parts and understanding the breakdown of costs will guide you in making informed decisions regarding the alternator replacement.
Post-Replacement Checklist
After replacing the alternator in your Mini Cooper, it's important to follow a thorough post-replacement checklist to make certain everything is in perfect working order. This checklist, derived from hands-on experience, will guide you through the essential steps to guarantee your Mini Cooper runs smoothly after the alternator replacement.
- Check All Electrical Connections: Make sure that all electrical connections to the alternator are securely attached. This includes the wiring harness and any auxiliary power connections. A loose connection can lead to charging issues or electrical malfunctions.
- Verify Serpentine Belt Installation: The serpentine belt, or drive belt, must be properly installed and tensioned. Incorrect installation can result in the belt slipping off or excessive wear, both of which could lead to engine overheating or battery drainage.
- Inspect Engine Ground Strap: Confirm that the engine ground strap is correctly connected. This is essential for the electrical system to function properly, as a poor ground can cause erratic electrical behavior or even damage to the electrical components.
- Reconnect Battery and Check Voltage: After reconnecting the battery terminal, check the battery voltage to ensure the alternator is charging the battery adequately. A healthy charging system should show a voltage between 13.8 and 14.2 volts when the engine is running.
Conclusion
So, you've waded through the intricacies of your Mini Cooper's alternator, armed with a toolbox that's probably worth more than your first car.
You've navigated the labyrinth of model variations, followed our step-by-step guide with the precision of a heart surgeon, and tackled common issues with the finesse of a seasoned mechanic.
After pouring in countless hours, or rather, an estimated few, you've saved a fortune in labor costs. Who knew becoming an overnight auto mechanic could be this rewarding?
Now, go enjoy that smooth ride, knowing you've conquered the beast under the hood.
