In your Mini Cooper, you'll find the blower motor either behind the dashboard or in the driver's side footwell. Properly identifying its location is key for maintaining your car's HVAC system, controlling airflow, and adjusting temperature accurately. Accessing it involves removing various trim pieces and components, a process that demands precision and care. You'll need specialized tools, such as a 1/4 drive ratchet with a 16-inch extension and T25 Torx screws. Remember, tackling this task may require disconnecting the battery and managing tight spaces effectively. Mastery of these steps not only assures efficient HVAC operation but also prepares you for further maintenance and troubleshooting insights.
Blower Motor Location
In most Mini Cooper models, you'll find the blower motor situated behind the dashboard or, in certain cases, within the driver's side footwell area. This location is vital for the efficient functioning of your vehicle's heating, ventilation, and air conditioning (HVAC) system. The blower motor's primary role is to control airflow and temperature within the cabin, making its accessibility critical for any replacement or maintenance tasks.
Proper identification of the blower motor's location is essential for efficient repair and maintenance. When it's located behind the instrument panel or dashboard, you might need to remove several trim pieces and components to access it. This complex procedure ensures that the blower motor can be reached without causing damage to other parts of the vehicle's interior.
For models where the blower motor is found in the driver's side footwell, the approach for maintenance or replacement might be slightly more straightforward, but it still requires careful maneuvering around tight spaces. Regardless of its location, understanding how to access the blower motor is key to guaranteeing the Mini Cooper's HVAC system operates effectively, maintaining the desired airflow and temperature settings inside the vehicle.
Dashboard Removal Steps
Before you begin removing the dashboard to access your Mini Cooper's blower motor, you'll need to prepare by gathering the necessary tools and ensuring you've disconnected the battery to avoid any electrical mishaps.
This process involves carefully detaching electrical components and removing trim pieces that secure the dashboard in place. Following a detailed guide or manual is essential for the safe removal of the dashboard, allowing you to reach and service the blower motor effectively.
Preparing Dashboard Removal
To start the dashboard removal process on your Mini Cooper, first disconnect the battery to avoid any electrical hazards. This initial step is important for your safety and the preservation of your vehicle's electrical system.
Before proceeding, gather all specialized tools required, especially Torx screws (T25), which are essential for detaching specific dashboard components, such as the steering column cover. It's vital to prioritize labeling and organizing all removed parts and screws. This meticulous approach guarantees a smooth reassembly later.
Removing trim pieces and additional fixtures necessitates precision and, at times, second person assistance. This collaboration not only enhances safety but also improves efficiency, making the dashboard removal a more manageable task.
Removing Dashboard Components
Once you've disconnected the battery and prepared your workspace, start by carefully disconnecting all electrical connections associated with the dashboard to guarantee a safe removal process.
To access the blower motor on your Mini Cooper, you'll need to remove various dashboard components. Begin by removing trim pieces and panels, paying close attention to the screws and fasteners holding them in place. Some models may require you to disconnect the steering shaft or access the cabin air filter before fully removing the dashboard.
It's important to follow a systematic approach, meticulously keeping track of each component removed to ensure smooth reassembly. For precise, model-specific instructions on removing dashboard components, always consult your Mini Cooper's repair manual.
Tools Required
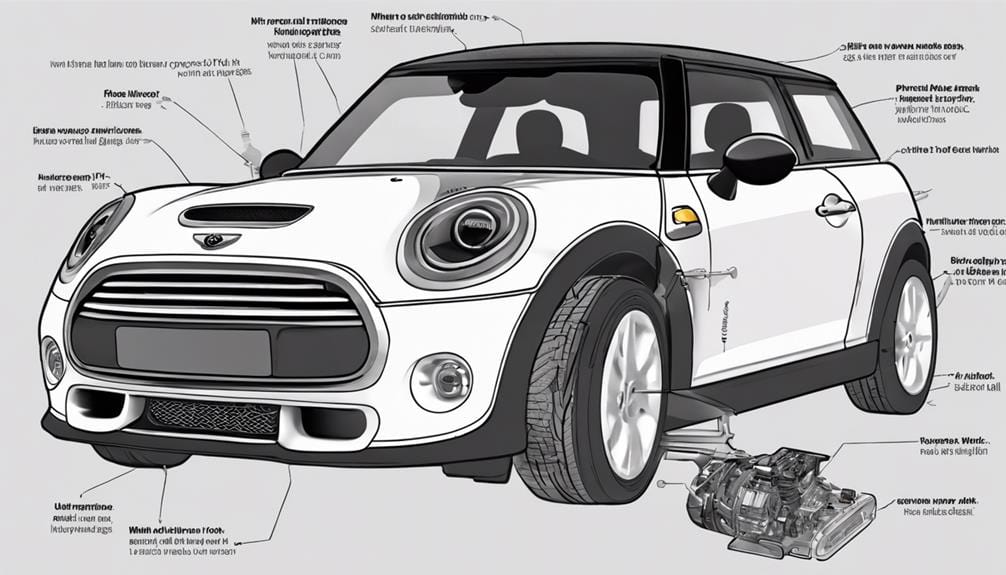
Gathering the necessary tools, including a 1/4 drive ratchet with a 16-inch extension and Torx screws (T25), is crucial for a smooth blower motor replacement on your Mini Cooper. These specific items aren't just suggestions; they're prerequisites for tackling the task at hand with precision and ease. The ratchet and extension will become your go-to equipment, allowing you to reach and maneuver around the tight spaces where the blower motor housing is located.
The inclusion of Torx screws (T25) underscores the need for specific screw types, highlighting the importance of preparation before diving into the replacement process. Besides these, having a set of basic hand tools, especially screwdrivers, can't be overlooked. They'll assist in the disassembly of components obstructing your path to the blower motor.
Moreover, utilizing a mirror or using the camera on your smartphone can greatly enhance your visibility in the cramped quarters behind the dashboard. This innovative solution helps in identifying the exact location of screws and connectors without the need for physical contortion.
Lastly, having a second person to assist can be invaluable. They can manage tools, provide additional visibility, or support in maneuvering parts, making the blower motor replacement process not just smoother, but safer.
Accessing the Blower Motor
Accessing your Mini Cooper's blower motor requires the careful removal of dashboard trim pieces and, in some cases, the cabin air filter for best reach and visibility. This essential component of your HVAC system, typically nestled behind the dashboard near the center of the vehicle, controls the airflow into the cabin, making it vital for both comfort and safety.
To start, you'll need to locate the blower motor, which in some Mini Cooper models, is situated in the driver's side footwell. This positioning allows for easier access for maintenance or replacement tasks. Removing the necessary dashboard trim involves precision and care to avoid damaging clips or the trim itself. In addition, the removal of the cabin air filter may be necessary to achieve efficient access to the blower motor.
Proper access isn't just about physical reach; it's about visibility and the ability to perform troubleshooting, maintenance, or replacement tasks efficiently. Issues like unusual noise, lack of airflow, or complete motor failure are common signs that your blower motor may need attention. Addressing these signs promptly can prevent more significant issues with your Mini Cooper's HVAC system down the line.
Blower Motor Types
When considering the blower motor in your Mini Cooper, it's important to distinguish between standard and advanced models, as this impacts functionality and efficiency.
Standard models typically feature centrifugal blower motors, prized for their efficient airflow, while advanced models may opt for squirrel cage motors, noted for their durability and quieter operation.
This knowledge not only aids in identifying your Mini Cooper's specifications but also informs maintenance and replacement strategies.
Standard Vs. Advanced Models
Distinguishing between standard and advanced MINI Cooper models reveals significant differences in their blower motor designs, impacting both maintenance and troubleshooting processes. In traditional models, you'll find the blower motor located behind the dashboard, essential for controlling the cabin's airflow. This setup is straightforward, making maintenance and troubleshooting relatively simple for those familiar with traditional automotive HVAC systems.
Conversely, advanced models like the MINI Cooper S feature a more sophisticated blower motor design. These models incorporate additional features for enhanced climate control performance, making the system more complex. Understanding the specific location and design of the blower motor in these advanced models is important for effective troubleshooting and maintenance, requiring a more nuanced approach compared to traditional models.
Functionality and Efficiency Differences
Understanding the differences in blower motor functionality and efficiency is key to optimizing your Mini Cooper's climate control system. Here's what you need to know:
- Single-Speed Blower Motors: These motors operate at a fixed speed, delivering consistent airflow for heating, ventilation, and air conditioning. While reliable, they lack the flexibility to adjust airflow based on specific cabin conditions.
- Variable-Speed Blower Motors: Offering superior airflow control, these motors adjust their speed to align with the cabin's temperature settings and requirements. This ensures precise climate control, enhancing both comfort and efficiency.
- Troubleshooting and Maintenance: Knowing whether your Mini Cooper is equipped with a single-speed or variable-speed blower motor is essential for effective troubleshooting and maintaining peak climate control performance.
Replacement Procedure
To replace the blower motor in a Mini Cooper, first make sure you've gathered all necessary tools and have securely parked your vehicle on a level surface. The blower motor, located behind the instrument panel on the passenger side, is essential for airflow control and temperature regulation inside your car. Symptoms indicating the need for replacement might include a lack of airflow, strange noises, or inconsistent operation.
Initiating the replacement procedure requires removing the glove box and various interior components to access the blower motor. This step is necessary as it ensures you can reach and properly remove the faulty motor. Employ a systematic approach throughout the process to avoid any mishaps or damage to surrounding parts.
Careful removal of the defective blower motor is crucial, followed by the precise installation of the new unit. Ensuring proper installation is important for restoring efficient functionality to your Mini Cooper's temperature regulation and airflow control systems. Remember, a meticulous and systematic approach not only guarantees the successful replacement of the blower motor but also contributes to the overall health and efficiency of your vehicle's climate control system.
Reassembly Tips
After carefully removing the blower motor, it's now important to focus on the reassembly process, making sure every step is meticulously followed for best functionality. The precision during this phase is vital to ensure that your Mini Cooper's HVAC system operates smoothly, without any unnecessary noise or vibrations.
Here are three key tips to keep in mind:
- Ensure Alignment and Secure Connections:
- Align the blower motor properly within its housing to prevent any operational noise or vibration issues. It's essential that all wiring harnesses are securely reconnected to avoid any electrical malfunctions. The precise alignment and secured connections are crucial for the system's efficiency and noise prevention.
- Use a Torque Wrench for Screws:
- Utilize a torque wrench to tighten the screws to the manufacturer's specified torque values. This ensures a secure fit without over-tightening, which could damage components or lead to improper fitment, contributing to vibrations or noise.
- Functionality Testing Before Trim Reinstallation:
- Before reinstalling the trim pieces, conduct a functionality test of the blower motor. This step verifies that everything is in perfect working order. Refer back to your photos or disassembly notes to make sure everything is correctly positioned for a seamless reassembly process, aiding in vibration and noise prevention.
Maintenance Advice
Consistently maintaining your Mini Cooper's blower motor is crucial for guaranteeing peak performance of the climate control system. Regular maintenance involves precise tasks, such as cleaning or replacing the cabin air filter. This step is crucial because it prevents debris buildup, which, if neglected, can severely impact the blower motor's lifespan and efficiency.
To sustain top-notch climate control, the maintenance of the blower motor shouldn't be overlooked. Efficient heating and cooling within your vehicle depend on the blower motor's ability to circulate air effectively. When maintenance is neglected, you might experience reduced airflow, hear unusual noises, or encounter potential system malfunctions. These signs indicate a compromised system performance, often leading to costly repairs if not addressed promptly.
Adhering to the manufacturer-recommended maintenance schedules is essential. Through regular inspection and timely intervention, such as cleaning the blower motor and replacing the cabin air filter when necessary, you ensure the system's top performance. This proactive approach not only enhances your driving comfort but also prevents the likelihood of unexpected repairs related to the blower motor.
Conclusion
You've navigated the labyrinth beneath the dashboard, tools in hand, emerging victorious with the old blower motor cradled like a trophy. Replacing it feels like conducting a symphony, each step precise, from the delicate unscrewing to the meticulous reassembly. Your Mini Cooper's breath now flows freely, a confirmation of your technical prowess.
Remember, regular maintenance guarantees this essential component sings harmoniously, keeping the cabin's climate in perfect balance. Your journey melds machine with mastery, a seamless blend of skill and care.
