In your Mini Cooper, you'll find the throttle body located between the air intake system and the intake manifold. This vital component houses the throttle position sensor, playing an essential role in your engine's performance by regulating the flow of air into the engine. It's prone to carbon buildup, so maintaining it is key to keeping your engine running smoothly. You'll need tools like a T30 Torx screwdriver for access, and remember to check the sealing O-ring for any needed replacement. Understanding its location and role is just the beginning of ensuring your Mini Cooper runs at its best.
Throttle Body Location
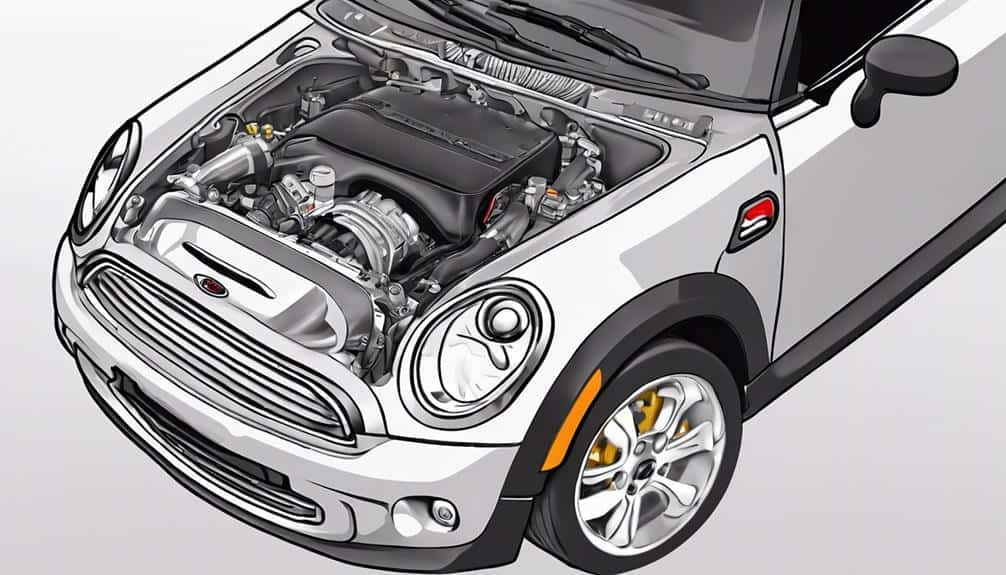
In a Mini Cooper R56, the throttle body sits strategically between the air intake system and the intake manifold, near the engine's throttle plate, to meticulously regulate airflow into the engine. This pivotal component, integral to your R56 Cooper's performance, isn't just about directing air; it's about precision in controlling your engine's breath – its lifeblood. The throttle body houses the throttle position sensor, a key player in managing your car's speed and overall zest.
Accessing this vital part might seem like an exploration into the engine bay's depths. You'll navigate past the intake duct and other components, each removal a step closer to the throttle body. It's a journey worth taking, especially considering the throttle body's susceptibility to carbon build-up. This accumulation, if left unchecked, can greatly impair your vehicle's performance.
Cleaning the throttle body isn't just a recommendation; it's essential. Regular maintenance prevents carbon deposits from restricting your R56 Cooper's performance, ensuring the engine runs smoothly and efficiently. So, when you're delving into your engine bay, remember, keeping the throttle body clean isn't just upkeep; it's ensuring your Mini Cooper performs at its peak.
Signs of Throttle Body Issues
You'll notice throttle body issues in your Mini Cooper through symptoms such as rough idle, engine stalling, and unexpected RPM fluctuations. These problems are more than just important; they're indicative of underlying issues with the throttle body, an essential component in your vehicle's air intake system. When functioning improperly, it can lead to a series of performance issues.
Key signs of throttle body problems include:
- Rough idle: Your Mini Cooper may struggle to maintain a consistent idle speed, indicating the throttle body isn't regulating air flow correctly.
- Engine stalling: If your engine stalls frequently, especially at low speeds or when starting, it could be due to throttle body malfunctions.
- Misfires: Irregular engine misfires might occur, disrupting your driving experience and potentially causing long-term damage.
Fault codes like P2138, P2102, P1638, P1639, and P115c can also point towards throttle body issues, triggering the check engine light. This is your Mini Cooper's way of telling you something's wrong. Beyond the immediate symptoms, a faulty throttle body can lead to reduced engine power and even force your car into limp mode, severely limiting its performance. Regular maintenance is key to preventing these issues and ensuring your throttle body functions correctly.
Required Tools and Parts
To tackle throttle body maintenance or replacement in your Mini Cooper, you'll need specific tools such as a T30 Torx screwdriver for removing fasteners. This particular tool is essential for detaching the throttle body from the intake manifold, a critical step in both maintenance and replacement processes. Additionally, make sure you have a new sealing O-ring on hand. This component is vital for creating a tight seal between the throttle body and the intake manifold upon reinstallation. Without a proper seal, your Cooper's engine could experience air leaks, leading to performance issues.
Furthermore, during the removal process, you may encounter connections to the air filter housing that require careful detachment. Having a set of pliers and a flathead screwdriver can be beneficial for loosening clamps and prying connectors gently without causing damage.
Precision in aligning the throttle body post with the intake manifold can't be overstated. Misalignment can lead to improper fitment, which might cause further complications. Therefore, patience and attention to detail are as important as the tools and parts you've gathered for the job. Ensuring you follow these guidelines will help maintain the best performance of your MINI Cooper and prevent potential issues related to the throttle body and air intake system.
Preparing for Throttle Body Access
Before you start working on the throttle body of your Mini Cooper, it's important to prepare your vehicle properly.
First, make sure you've located the intake air duct and throttle housing, and have removed any components, like the air filter housing, that could block access.
Additionally, it's vital to let the engine cool down to avoid injuries, and have tools such as a T30 Torx screwdriver at hand, while also strictly adhering to safety guidelines outlined in the repair manual.
Vehicle Preparation Steps
Gaining access to the throttle body in a Mini Cooper first requires the removal of the air filter housing, located in the engine bay. This is particularly important for models such as the Mini Cooper S and those documented by Pelican Parts. Before diving into this task, it's essential to:
- Identify the air filter housing and its securing screws.
- Have a screwdriver ready for the screws and a clamp for the intake coupler near the throttle body.
- Take steps to make sure no debris enters the intake system during this process.
Removing the air filter housing exposes the throttle body, requiring precise handling and attention to detail. Following these preparation steps ensures a safe and effective way to access the throttle body for maintenance or servicing.
Necessary Tools and Equipment
Accessing the throttle body in a Mini Cooper requires a T30 Torx screwdriver among other specific tools to remove the fasteners securely. You'll also need to loosen the clamps near the intake coupler for proper removal. Before diving in, make sure you've safely disconnected any sensors attached to the throttle body to avoid damaging them. The process often involves removing intake ducts and inspecting air filter components for better visibility and access.
To emphasize, here's a quick checklist of tools and actions required:
| Tool/Action | Purpose |
|---|---|
| T30 Torx screwdriver | For removing throttle body fasteners |
| Pliers | For loosening intake coupler clamps |
| Sensor disconnecting tools | For safely removing connections to sensors |
| Flashlight | To illuminate work areas and verify connections |
This preparation guarantees a smooth and damage-free throttle body access.
Safety Precautions Overview
After preparing your tools and disconnecting necessary sensors, it's important to focus on safety measures to avoid injuries or damage while working on your Mini Cooper's throttle body. Before you start, make sure the engine is cool to prevent burns. Disconnecting the vehicle's battery is essential to avoid electrical shock, especially when your hands are near the throttle body.
- Use a T30 Torx screwdriver to carefully remove fasteners without stripping them.
- Wear gloves and eye protection to prevent cuts and debris from causing harm.
- Pay close attention to the red arrow and red tab indicators on the MINI R series for proper disassembly and to avoid breaking sensitive components.
Following these guidelines helps prevent triggering the engine light due to improper handling or accidental damage during the procedure.
Removing the Air Intake System
To remove the air intake system in your Mini Cooper, you'll need to start by loosening the clamps that secure the air intake duct and disconnecting any sensors attached to it. This is an important initial step for accessing the throttle body, which is nestled beneath. Use a screwdriver or a suitable tool for the clamps, and be gentle with the sensor connectors to avoid damage. Remember, any modification, such as replacing a part, should only be done with compatible components to guarantee proper fit and function.
Next, you'll need to carefully remove the air filter housing. This typically involves unscrewing or unclasping several fasteners that hold it in place. Pay close attention to how everything fits together; taking pictures before disassembly can help with reassembly later.
Once the air intake duct and air filter housing are removed, you'll have clear access to the throttle body for maintenance or cleaning. It's essential to make sure that all components are reassembled securely. A tight fit around the throttle body prevents air leaks, which are essential for peak engine performance and efficiency.
Disconnecting Throttle Body Sensors
Before you disconnect throttle body sensors on your Mini Cooper, it's important to follow specific safety precautions, such as ensuring the engine is off and the key is out of the ignition.
You'll then proceed with the sensor removal steps, carefully unplugging the electrical connectors from the sensors.
Safety Precautions
To guarantee that the Mini Cooper's engine is off and the key is removed from the ignition to prevent accidental activation before disconnecting throttle body sensors, follow these precise steps. Throttle body sensors, situated on the throttle body housing's side, demand meticulous handling to avoid impairing the connectors or wiring harnesses.
When dealing with these sensors, remember to:
- Use caution to prevent damaging the sensor connectors.
- Be mindful of the locking tabs that may need pressing or lifting for release.
- Ensure a secure reconnection after maintenance to maintain the throttle system's integrity.
Given the variation in design across Mini Cooper models, recognizing and correctly manipulating the locking mechanism is important for a safe and effective maintenance process.
Sensor Removal Steps
Disconnecting the throttle body sensors in your Mini Cooper starts with identifying the electrical connector attached to the throttle body. Gently press the tab on the connector to release the locking mechanism. This action is important for a smooth disconnection without causing damage to the connector or the wiring harness.
After releasing the lock, carefully remove the connector by pulling it straight out. It's vital to handle the connector with care to avoid any damage. To guarantee a trouble-free reinstallation, properly label or mark the connectors. This step is often overlooked but is necessary for accurate sensor replacement.
Reconnection and Testing
Once you've reconnected the throttle body sensors on your Mini Cooper, it's vital to start the engine and monitor for any dashboard warning lights or unusual throttle behavior to verify the sensors are functioning correctly. This includes the throttle position sensor (TPS) and the idle air control valve (IACV), which are essential for smooth engine operation and throttle response.
To guarantee proper functionality:
- Use a scan tool to check for correct voltage and signal readings.
- Observe the engine's idle behavior and throttle response during acceleration.
- Look for any dashboard warning lights that may indicate sensor issues.
Careful reconnection followed by these testing steps ensures your Mini Cooper's throttle system operates efficiently and reliably.
Throttle Body Removal Steps
Begin your throttle body removal by first unplugging the electrical connector and then proceeding to detach the intake duct. This is a critical initial step in making sure that you can safely remove the throttle body from your Mini Cooper. Located near the intake manifold, the throttle body is an essential component of the intake system, playing a pivotal role in managing the air flow to your engine.
Once you've successfully disconnected the electrical connector and removed the intake duct, you'll need a T30 Torx screwdriver. This specific tool is necessary to loosen the fasteners that secure the throttle body in place. Handle each screw with care to avoid stripping the heads, ensuring a smooth removal process.
As you remove the throttle body, pay attention to the sealing O-ring. This small but vital component must be replaced during reinstallation to prevent air leaks. Make sure that you have a new O-ring ready for when you're putting the throttle body back.
Cleaning the Throttle Body
Before you tackle cleaning the throttle body on your Mini Cooper, you'll need to gather the necessary tools and materials, making sure you have a throttle body cleaner that's safe for use on your vehicle's components.
Following a step-by-step guide will help you methodically remove carbon buildup from the butterfly plate, enhancing your car's overall performance.
Necessary Tools and Materials
To properly clean the throttle body in your Mini Cooper, you'll need throttle body cleaner, a rag for wiping, and a basic set of hand tools. The location of the throttle body near the intake manifold may necessitate the removal of the air intake duct, making accessibility important for thorough cleaning. This process is essential for removing carbon deposits and dirt that hinder engine performance and throttle response.
For best cleaning, make sure you have:
- A high-quality throttle body cleaner specifically designed for automotive use
- A clean, lint-free rag for wiping away grime and cleaner residue
- A set of hand tools, including screwdrivers and wrenches, suitable for removing any components obstructing access to the throttle body
Regular maintenance of the throttle body is crucial for preserving your Mini Cooper's engine efficiency and fuel economy.
Step-by-Step Cleaning Guide
Ensuring your Mini Cooper maintains peak performance starts with carefully loosening the clamp that secures the throttle body, allowing for its thorough cleaning.
You'll need to disconnect any sensors attached to the throttle body to access the butterfly plate fully. With these components detached, apply a specific throttle body cleaner directly onto the buildup around the throttle plate. This step is important for removing carbon deposits that hinder smooth throttle movement.
After meticulously cleaning, reattach all components and sensors to their original positions. Then, start your engine to confirm it operates smoothly without any leaks or issues. This process not only enhances performance but also prevents potential issues related to throttle body clogs.
Reinstalling the Throttle Body
When reinstalling the throttle body in a Mini Cooper, first align the post on the throttle body with the corresponding hole on the intake manifold. This step is essential for a seamless fit and guarantees that the throttle body sits perfectly in its designated position.
Next, it's important to replace the throttle body sealing O-ring. A new O-ring is critical for creating an airtight seal, which prevents air leaks that could adversely affect the engine's performance.
Here are the key points to remember during the reinstallation process:
- Replace the throttle body sealing O-ring to avoid any potential air leaks.
- Use a T30 Torx screwdriver for securing the throttle body in place. This specific tool ensures that the screws are tightened to the correct specification, preventing any damage to the screws or the throttle body itself.
- Ensure all connections are tight and secure. Before moving on to any further steps, double-check that everything is properly fastened to avoid issues during operation.
It's crucial to focus on precision and ensure that every component is correctly aligned and secured. This meticulous approach will contribute greatly to the optimum functionality of the throttle body once reinstalled.
Reconnecting Sensors and Air Intake
After reinstalling the throttle body, you'll need to focus on properly reconnecting sensors and the air intake to maintain peak engine performance. Ensuring proper alignment and secure attachment of the sensors is essential to prevent air leaks which can detrimentally affect your Mini Cooper's throttle response and overall engine efficiency.
When it comes to reconnecting the air intake, the key is to align the intake coupler precisely with the throttle body and tighten the clamp with enough force to ensure a secure, leak-free connection. This step is critical for the best flow of air into the engine, directly impacting its performance.
| Step | Detail | Importance |
|---|---|---|
| Align Sensors | Ensure sensors align perfectly with their ports. | Prevents air leaks, ensuring accurate throttle response. |
| Secure Connectors | Verify connectors are seated and locked. | Avoids electrical issues, ensuring smooth operation. |
| Tighten Intake Coupler Clamp | Align and secure the intake coupler. | Prevents air leaks, optimizing engine performance. |
| Check for Vacuum Leaks | Inspect all connections for leaks. | Ensures the integrity of the throttle body system. |
Proper sensor reconnection is essential. Verify that all electrical connectors are properly seated and locked to avoid any potential issues. After reassembly, always check for any loose connections or vacuum leaks that may affect the throttle body operation.
Testing Throttle Body Function
To properly assess your Mini Cooper's throttle body function, you'll need to employ specialized diagnostic tools for identifying any fault codes related to the throttle position sensors. This initial step is important for pinpointing issues that could be affecting your throttle body's performance. Beyond scanning for codes, a thorough evaluation involves several technical steps to guarantee the throttle body operates within the manufacturer's specifications.
- Measure the voltage and resistance of the throttle position sensors. These values must fall within a specific range to confirm the sensors are functioning correctly.
- Inspect the throttle body for signs of carbon buildup or debris. Such contaminants can hinder the throttle body's movement, leading to erratic performance.
- Perform a throttle body adaptation reset with your diagnostic tool. This process recalibrates the throttle position for accurate communication with the vehicle's computer system.
Lastly, testing the throttle response is essential. You'll do this by monitoring the throttle angle readings via the diagnostic tool while manually operating the accelerator pedal. This step verifies that the throttle body is correctly interpreting and responding to input, ensuring your Mini Cooper's engine receives the appropriate air-fuel mixture for top performance.
Maintenance Tips and Tricks
Having covered how to test your Mini Cooper's throttle body function, let's now explore some maintenance tips and tricks to guarantee peak performance.
Regular inspection and cleaning of the throttle body, nestled between the air intake system and the intake manifold, are essential. This routine prevents the accumulation of carbon on the butterfly plate, ensuring unobstructed airflow and smooth engine operation.
To clean, you'll need to carefully remove the throttle body, paying special attention to the removal of carbon build-up. Use appropriate cleaners and tools designed for throttle body maintenance to avoid any damage. After cleaning, reassembling requires precision; make sure the intake coupler is securely reattached and scrutinize for any potential leaks that could undermine engine performance.
For those looking to enhance their Mini Cooper's breathability and overall efficiency, consider upgrading to a cold air intake system. This modification not only improves airflow but can also contribute to better engine performance. Remember, maintaining the throttle body isn't just about cleaning; it's about ensuring every component works harmoniously for the ultimate driving experience.
Conclusion
In wrapping up, you've now mastered the art of accessing and servicing your Mini Cooper's throttle body. Remember, keeping this component in tip-top shape is key to ensuring your ride runs smoothly. By following these steps, you've not only saved yourself a pretty penny but also gained invaluable hands-on experience.
So, the next time your Mini acts up, you'll know exactly what strings to pull. Keep up with regular maintenance, and your Mini will thank you with unwavering performance.
